»

Saturday, July 2, 2011

Popsicle Holders - Why didn't I thin of that

The age old dilemma, give your kid a popsicle and they complain about their hands getting cold so what do you do you wrap it in a napkin or paper towel or as my sister does you put it in a kids sock. Well no longer thanks to Stephanie over at Under the Table and Dreaming. She has a great tutorial on how to make one from felt here I however did not have any felt in the house so I decided to let Walker pick out whatever fabric he wanted for the outside and used parts of a scrap fleece blanket for the inside and this is what I came up with.


and here are 3 of the boys enjoying their popsicles with nice warm hands :-)


Photobucket

Friday, July 1, 2011

Boys shorts out of old ACU's

My husband went through all his ACU's and pulled out a BUNCH of ones that are too worn out to be worn anymore so I have a big stack of them and decided to turn one of his  pld pair of pants into shorts for my boys.

I cut out Walker's shorts so that I could have both the BIG cargo side pockets that are on either side of the pants on his shorts

Jordan's was cut using the bottom hem of the pants leg so it didn't have any pockets so I cut one of the smaller cargo pockets out and put it on one of the leg pieces before I sewing it together. I made both using an elastic waste.


I also made Jordan an appliqued USA shirt using part of Darin's old ACU sleeve left over from the purse I made myself back in Dec.


Photobucket

Tuesday, June 28, 2011

Donuts Paula Deen Style

I LOVE Paula Deen so when I wanted to try a new donut recipe I was happy to find she had a yeast donut recipe.

Homemade Yeast Donuts 

*I doubled this recipe*

3/4 cup warm milk
1 packet active dry yeast
1/4 cup granulated sugar
2 1/2 cups all-purpose flour plus extra for dusting your dough and board
1/4 teaspoons kosher salt
2 tablespoons unsalted butter, at room temperature
2 egg yolks
Nonstick cooking spray
Peanut Oil for frying (Can substitute vegetable oil)

Glaze:
1 stick butter, room temperature
2 1/2 cups confectioner’s sugar
2 teaspoons vanilla extract
4 tablespoons hot water

In the bowl of a standing mixer, pour warm milk, sugar and yeast. Let stand until yeast starts to foam. About 10 minutes. Attach dough hook to standing mixer while yeast is activating.


In a medium mixing bowl, whisk together the flour and salt.

yeast mixture after setting for 10 minutes


Add flour mixture, butter and egg yolks to the yeast mixture and beat on medium speed until it comes together and forms a ball. Just about 3-5 minutes. Cover the bowl and and allow the dough to rise in a warm place for 1 hour.


Dough after sitting for an hour


Spray a sheet tray with non stick cooking spray and set aside. Transfer the dough to a lightly floured work surface and roll out to a 1/2” thickness.


Using a 2”-3” donut cutter (you can also use a drinking glass or biscuit cutter to cut out your donuts and a plastic bottle cap to cut out the holes), cut out donuts and transfer them and their holes to the prepared baking sheet, spacing them 1” apart. Spray the tops of the donuts and holes with nonstick cooking spray and cover with plastic wrap. Let stand in a warm place until they have almost doubled in size, about 30 minutes.


Using a deep fryer or dutch oven, heat oil to 350ºF. Line a baking sheet with paper towels or brown paper and set aside.


Working in batches, fry the donuts and donut holes until lightly golden brown, about 1 minute per side. Transfer to the paper lined baking sheet and let cool for 10 minutes before glazing.


To make the glaze: In a large mixing bowl using a hand mixer or whisk, mix all ingredients together. Mixture should be thin. Add more hot water if needed to thin out the glaze. Keep glaze warm until ready to use.

Dip the donuts, one at a time, into the warm glaze, covering the top half of each donut with glaze. Dip glaze side down into a bowl filled with your favorite sprinkles and place on a tray to set for 10 minutes. Serve immediately.


Photobucket

Wednesday, May 18, 2011

Yard Work - Love this time of year!

Monday Darin & I decided to do some landscaping in the front yard, pulled up the cactus, moved the cannas from between the hedges out into the circle flower bed & walkway flower bed, worked on both flower beds and then today Darin planted some new grass in between the hedges close to the house. We decided to get rid of both flower beds right in front of the house and allow the hedges to grow together (once they are big enough) will make maintenance of them a lot easier and hopefully give the cannas & hedges more room to thrive.

Here are a few photos that I took the other day before we started any work in the front
the walkway beds are very unbalanced right now, I used to have a mirror image of each flower on each side but the snow killed most my plants, this year I tried seeds and they are just now coming up


This flower garden looks kinda like it was just thrown in the middle of the yard now that the huge pine tree is gone. Thinking of either a bird bath for the middle or a big potted plant/tree. Eventually we will dig out the old stump and plant a new smaller non sap tree.

this is an area by our side door (dinning room) that was nothing but mud so Darin added some grass squares so hopefully by next spring it should be all green and pretty

And these are some after shots

you can see on the right side of the house that we haven't dug out all the old mulch yet, Darin must have dug up a good 6 inches of it on the left side already


after removing LOTS of old mulch, the small old worn out white "fence" and my cannas, then adding grass squares

the walkway flower bed a little more balanced, added some cannas & moved some of those white plants from the right side to the left to balance it out more

and two pictures of my pretty lillies


Photobucket

Tuesday, May 17, 2011

The boys ABC book & Paper Coterie product review

A few weeks ago I learned about a new company called Paper Coterie that offers photo books, posters, journals and things like that. From May 4th - May 6th they were doing a grand opening special where they had given out a code for a $40 credit to their online store (you just pay shipping and anything over $40). After looking around for a few minutes I decided to give them a try since their products were so cute and with a $40 credit what was the harm in trying. I decided to make an 8x8 hardcover photo book  for the boys and a 80 page journal for Darin to take when he deploys next year. I went $4 over my credit (because I wanted a hardcover book instead of softcover) so with shipping & the extra $4 they cost me $22.83. The design process was pretty simple and it really allowed me to design each page from scratch so I didn't have to fit my photos into a premade mold like most companies.It took about only about 9 days from the day I placed my order until the books arrived. Walker was so excited when they got here.The quality of the books are really nice, thick pages and very vibrant photos. My only negative comment is that they put a bar code on the last page of the book that covered up a few letters in the sentence written on it. I wish they had the bar code placed in the template so you would know not to put anything in that area. But other than that I am extremely happy with my books and will visit them again.

Here are photos of the books after we got them


inside of Darin's journal, got him one last time but it wasn't lined so he never used it.


Photobucket

Monday, May 16, 2011

How does your garden grow - month 3

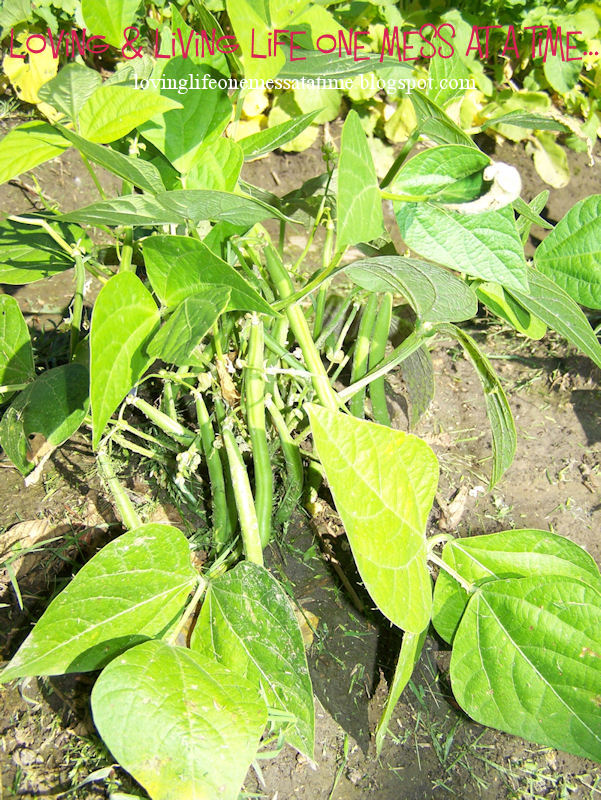
Checking the garden this morning we were surprised to find a ton of green beans and peas with a few ready to pick. The tomatoes & squash have exploded but none are ready to pick yet, Darin can't wait for the tomatoes to be ready he eats them like apples. He has done a great job with the garden and it is really neat to see how much it's grown over the last 3 months.


Walker with his HUGE squash plants

and with his tomato plants that he grew from seeds


these cucumber plants are also some that Walker grew from seeds


this is our 2nd harvest of radish, but the 1st of green bean & peas - we just picked the ones that were big enough to come in.


**also as you can tell I've decided to start watermarking my photos. Anything that has a photo of us or the boys will have a watermark across the body just to protect the photos from being stolen. I don't do this on my private blog but for this one I decided that would be the best way to be able to have photos of us & the kids on here.**


Photobucket